Search This Blog

Monday 20 April 2015

10 Great Intel Galileo Features

This is not The Programming Stuff But its helpful to All Computer Users:

Have A LLOOOOKK...


The Intel Galileo board. (Image by Matt Richardson)
The Intel Galileo board
Intel and Arduino’s announcement about the new Galileo board is big news. It’s a Linux-based board that I’ve found to be remarkably compatible with the Arduino ecosystem based on my first few steps with a prerelease version of the board. Here are some of the best features of this groundbreaking collaboration between Intel and Arduino:
Shield Compatibility
The expansion header on the top of Galileo should look familiar since it’s compatible with 5V and 3.3V Arduino shields designed for the Uno R3 (also known as the Arduino 1.0 pinout). This means that it has 14 digital I/O pins, 6 analog inputs, a serial port, and an ICSP header.

Familiar IDE
The Intel-provided integrated development environment for the Galileo looks exactly like the Arduino IDE on the surface. Under the Boards menu, you’ll see addition of the Galileo under “Arduino X86 Boards.” The modified IDE also is capable of upgrading the firmware on the board.

Ethernet Library Compatibility
Using the Ethernet port on the board is as simple as using Arduino’s Ethernet library. I was able to get a HTTP connection to Google without even modifying the standard WebClient example.

Real Time Clock
Most Linux boards rely on a connection to the Internet to get the current date and time. But with Galileo’s on-board RTC (real time clock), you’ll be able to track time even when the board is powered off. Just wire up a 3.0V coin cell battery to the board.

Works with PCI Express Mini Cards
On the bottom of the board is an expansion slot for PCI Express Mini cards. This means you can connect WiFi, Bluetooth, GSM cards for connectivity, or even a solid state drive for more storage. When you connect a WiFi card, it will work with Arduino’s Wifi library.

USB Host Port
Galileo’s dedicated USB On-The-Go port will let you use the the Arduino USB Host library to act as a keyboard or mouse for other computers.

MicroSD Support
If you want to store data, a microSD card slot is accessible from your code by using the standard Arduino SD card library.

TWI/I2C, SPI Support
Using the standard Arduino Wire library or SPI library, you can connect TWI/I2C or SPI components to the Galileo.

Serial Connectivity
Not only is there the typical serial port for your sketches on pins 0 and 1 of the Arduino pinout, but there’s also a separate serial port for connecting to the Linux command line from your computer. You’ll connect to it through the audio jack interconnect next to the Ethernet port. This port is only used for serial.

Linux on Board
A very light distribution of Linux is loaded onto the 8 MB of flash memory. If you want to use tools like ALSA (for sound), V4L2 (for video input), Python, SSH, node.js (for web projects), and openCV (for computer vision), you can boot Galileo from an SD card image that Intel provides

Wednesday 15 April 2015

CS50 Lecture by Mark Zuckerberg

Tuesday 14 April 2015

3 Ways to Prevent Method Overriding in Java - Private, Static and Final

Every Java programmer knows that final modifier can be used to prevent method overriding in Java because there is no way someone can override final methods; but, apart from final modifier, is there any other way to prevent method overriding in Java? This was the exact question, asked to one of my friend in a recent Java interview at one of the leading Investment bank. I guess, he was lucky to get this question because he already knows those tricks and was able to answer it quickly. When he told me about his experience,  I didn't understand why someone ask this question? What is the purpose? What they were trying to find out? I can understand if they have asked what's the best way to prevent method overriding in Java, or what is the risk of overriding? Anyway, It gives me an opportunity to recap some of the other technique (syntactically) to prevent a method from being overridden and write this blog post to share some mystery tricks from Java world. Some of you might be aware of those non obvious way to prevent method overriding, but if you don't, here is your opportunity to learn.


Private, Static and Final Methods - Can't Overridden in Java

Apart from final methods there are two more techniques which you can use to prevent a method from being overridden in Java. If you are familiar with private and static modifier in Java, then you may be knowing that private method is not accessible in subclass, which means they can not be overridden as well, because overriding happens at child class. Similarly, static methods can not be overridden in Java, because they are resolved and bonded during compile time, while overriding takes place at runtime. They are resolved based upon the type and not object. Overriding happens due to polymorphic property of objects. By the way, can you override static methods in Java and why a static method can not be overridden in Java, are also two of the most frequently asked Java questions. In short, apart from final modifier, you can also use static and private modifier to prevent a method from being overridden.


Best Way to Prevent Method Overriding in Java

As far as Java best practice is concern, you should always use final keyword to indicate that a method is not meant for overriding. final modifier has a readability advantage, as well as consistency advantage, because as soon as a Java programmer sees a final method, he knows that this can not be overridden. Private method implies that this method is only accessible in this class, which in turns implies that, you can not override private methods on derived class. As you can see, private methods still requires one more step to realize that it can not be overridden. What creates confusion with private and static methods are that, you can hide these methods in subclass. There is a difference between method hiding and method overriding, A method is hidden in subclass, if it signature is same as of super class method, but at a call to hidden method is resolved during compile time, while a call to overridden method is resolved during run time.
Difference between final, static and private method

In terms of performance, I think all three privatestatic and final method performs more or less same, because they all bonded during compile time using static binding. Another reason of using final modifier to prevent method overriding is compile time check. Since an attempt to override a final method is a compilation error in Java, it prevents accidental overriding. On the other handprivate and static methods can unknowingly hide super class method and create subtle bugs, because compiler will not flag any error or warning. By the way, you can avoid this kind of accidental method overriding by using @Override annotation in Java. If you use @Override annotation, whenever you intent to override a method, compiler will flag error and save you from accidentally hidingprivate and static methods. Just try following Java program after putting @Override annotation on static and private method, to see how compiler helps you.


Code Example - Private, Static and Final method

In this Java program, we will create two classes Base and Derived with three methods, one static, one final and one private. By observing output, you can see verify that final, private and static methods can not be overridden in Java. Since overriding final methods is compilation error, I had to comment that code. You can clearly see that, even though we have similar private and static methodin Derived class, and we are using Derived object to call those method, they are not called. Which means private and static method can only be hidden, but not overridden.
package test;

/**
  * Java program to show that private, static and final method can not be
  * overridden in Java.
  */
public class PrivateFinalStaticOverridingTest {
 
    public static void main(String args[]) {
 
        // Reference variable of type Base - Object of type Derived
        Base b = new Derived();
     
        System.out.println(b.version());
        System.out.println(b.name());
           
    }    
 
}

/**
  * Base Class which contains three methods with final, static, and private
  * modifier, to show that these method can't be overridden in Java.
  *
  * @author Javin
  */
class Base{
 
    public final String version(){
        where(); // This will call Base class where() method
        return "1.0.0";
    }
 
    public static String name(){
        return "Base";
    }
 
    private void where(){
        System.out.println("Inside Base Class");
    }
}

/**
  * Derived Class, which extends Base and tries to override final, static
  * and private methods in Java.
  */
class Derived extends Base{
 
    // Compilation Error : Final method can't be overridden in Java
//    public final String version(){
//        return "2.0.0";
//    }
 
    // Hidden static method - Same Signature but bonded at compile time
    public static String name(){
        return "Derived";
    }
 
    // Hidden private method - Same signature but resolved at compile time
    private void where(){
        System.out.println("Inside Derived Class");
    }
}

Output:
Inside Base Class
1.0.0
Base

In the code above, you can see that in Base.java we have three methods, final method version(), static method name() and private method where(). In the sub class Derived.java, we tried to override final method but compiler gave us error, forcing us to comment that code. Though we are able to create private and static method of same name and syntax in the sub class, but this is not overriding. To verify that we ran the program and program called methods of derived object with type of base class. In this case any overridden method will be execute code defined in derive class but you can see from output that code defined in Base class is executed. In short, its not possible to override private and static method in Java.


That's all about 3 ways to prevent a method from being overridden in Java. Remember, though syntactically you can use privatestatic and final modifier to prevent method overriding, but you should always use final modifier to prevent overriding. final is best way to say a method is complete and can't be overridden. It's also a good coding practice in Java to use @Override annotation, when your intention is overriding and not hiding, this will prevent subtle bugs. You should also be clear, when to use final keyword in Java, because it limits client's ability to override something, but same time necessary to prevent security and sensitive behavior intact.


Why Our Kids Must Learn to Code

Saturday 11 April 2015

How to Remove Given Character From String in Java - Recursion


Write a program to remove a given character from String in Java. Your program must remove all occurrences of given character. For example, if given String is "aaaaa" and String to remove is "a" then output should be an empty String. Similarly if input String is "abc" and character to remove is "b" then your program must return "ac" as output. You are not allowed to use any JDK method or third party method which solves this method directly, but you can use basic String manipulation method like indexOf()toChar() or substring() from java.lang.String class. Most important thing is, you must code the logic to solve the problem by yourself. You should also write the solution using both Iterative and Recursive algorithms. An Iterative algorithm is the one which make use of loops e.g. for loop, while loop or do while loop, which recursive solution should not use any loop. Now let's think how can we solve this problem? Most simple solution which comes in my mind is to iterate over String by converting into character array and check if current character is same as given character to remove or not, if it is then ignore it otherwise add character into StringBuilder. At the end of iteration you will have a StringBuilder with all character except the one which is asked to remove, just convert this StringBuilder to String and your solution is ready. This solution should have space complexity of O(n) because you need an extra buffer of same size as original String and time complexity will also be O(n) because you need to loop over all elements of String. Can you make it better? because this solution will not work for large String, especially if you have memory constraint. Now, let's see how to remove character from String recursively?BTW, this is one of the good coding question and has been asked in companies like Goldman Sachs, Amazon and Microsoft. So if you are preparing for programming job interviews, make sure you include this question in your list as well.


Removing a given Character From String Recursively


In order to solve this problem recursively, we need a base case and a process which reduce the problem space after each recursive step. We can solve this problem using indexOf() and substring() method of Java's String classindexOf() method returns index of a given character if its present in the String on which this method is called, otherwise -1. So first step, we will try to find the index of given character, if its present then we will remove it using substring() method, if not present then it become our base case and problem is solved.

Here is our sample program to recursively remove all occurrences of a given character.


import java.util.ArrayList;
import java.util.List;
import org.slf4j.Logger;
import org.slf4j.LoggerFactory;
/**
* Java program to remove given character from a given String using loops and recursion,
* asked as coding question to Java programmers.
**/
public class RemoveCharFromString {
private static final Logger logger = LoggerFactory.getLogger(RemoveCharFromString.class);
public static String remove(String word, char unwanted){
StringBuilder sb = new StringBuilder();
char[] letters = word.toCharArray();
for(char c : letters){
if(c != unwanted ){
sb.append(c);
}
}
return sb.toString();
}
public static String removeRecursive(String word, char ch){
int index = word.indexOf(ch);
if(index == -1){
return word;
}
return removeRecursive(word.substring(0, index) + word.substring(index +1, word.length()), ch);
}
}


You can see that we have two method, both accept one String and a character which needs to be removed from the given String. The first methodremove(String word, char unwanted) deletes the given character using iteration while second method removeRecursive(String word, char ch), uses recursion to accomplish this task.


Unit Testing of Solution


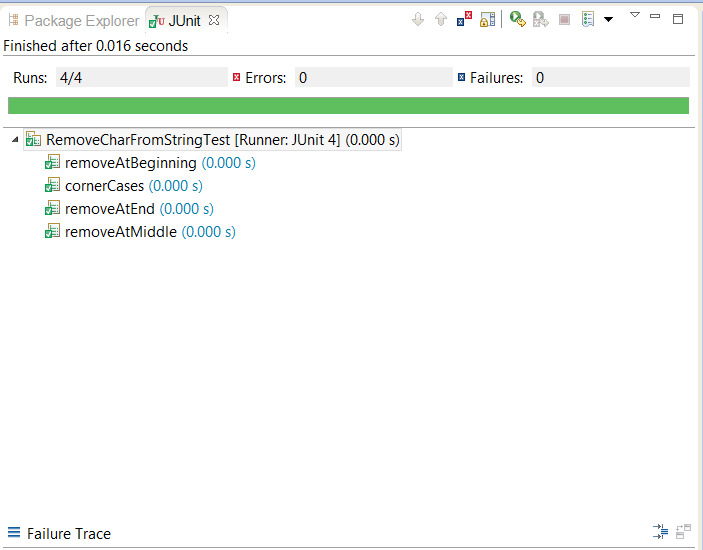
Here is our suite of JUnit tests to check whether this program is working properly or not. We have unit test to check removing a character from beginning, middle and end. We also have unit test for corner cases like removing the only character String contains, or removing character from String which contains same character multiple times. You can also add other tests for checking with empty String, NULL and trying to remove a character which is not present in the String. One thing to note here is that, we are testing both of our remove() method, one which removes given character using iteration and other which removes specified character using recursion.


import static org.junit.Assert.*;
import org.junit.Test;
/**
* JUnit test to for unit testing our remove() utility method, which accepts
* an String and a character, to remove all occurrences of that character
*/
* from that String.
public class RemoveCharFromStringTest {
@Test
public void removeAtBeginning(){
assertEquals("bc", RemoveCharFromString.remove("abc", 'a'));
assertEquals("bc", RemoveCharFromString.removeRecursive("abc", 'a'));
assertEquals("bcdefgh", RemoveCharFromString.removeRecursive("abcdefgh", 'a'));
}
@Test
public void removeAtMiddle(){
assertEquals("abd", RemoveCharFromString.remove("abcd", 'c'));
assertEquals("abd", RemoveCharFromString.removeRecursive("abcd", 'c'));
}
@Test
public void removeAtEnd(){
assertEquals("abc", RemoveCharFromString.remove("abcd", 'd'));
assertEquals("abc", RemoveCharFromString.removeRecursive("abcd", 'd'));
}
@Test
public void cornerCases(){
// empty string test
assertEquals("", RemoveCharFromString.remove("", 'd'));
// all removable character test
assertEquals("", RemoveCharFromString.remove("aaaaaaaaaaaaaa", 'a'));
// all but one removable characters
assertEquals("b", RemoveCharFromString.remove("aaaaaaaaaaaaaab", 'a'));
}
}


and here is the Output of running our JUnit tests in Eclipse IDE :

Testsuite: RemoveCharFromStringTest
Tests run: 4, Failures: 0, Errors: 0, Time elapsed: 0.172 sec

Java Program to remove given Character from String


That's all about how to remove a given character from given String in Java. This is a question which often appears in various Java interviews, written test and telephonic round. You should remember both iterative and recursive algorithm to solve this problem and pros and cons of each approach.


Sunday 5 April 2015

How to delete a directory with files in Java - Example

Deleting an empty directory is easy in Java, just use delete() method of java.io.File class, but deleting a directory with files is unfortunately not easy. You just can't delete a folder if it contains files or sub folders. Calling delete() method on a File instance representing a non empty directory will just return false without removing the directory. In order to delete this folder, you need to delete all files and sub directories inside this folder. This may seem cumbersome, but unfortunately there is no method which can delete directory with files in Java, not even on Java 7 Files and Paths class. So there is two choices, either you write your own method to recursively delete all files and folder before deleting a directory or alternatively you can use an open source utility library like Apache Commons IO which will do this for you. BTW, If you have to do this without using any third party library than you can use the example shown in this tutorial. You know what, I have asked this question couple of times to Java developers and only 3 out of 10 knows that you cannot delete directory with files in Java. I am not surprised because this is the kind of detail which is not obvious. Until you do it, you don't know this. Java isn't able to delete folders with data in it. You have to delete all files before deleting the folder. There also unfortunately no direct method to delete a directory with files. Though, In JDK 7 you could use Files.walkFileTree() and Files.deleteIfExists() to delete a tree of files.


Java Program to delete non empty directory in Java

Primary method to delete a file or directory in Java was File.delete() method form java.io package. This method can be used to delete a file or a nonempty directory but fail silently when it comes to deleting folder with files. If you ignore return value of this method, which is false if it failed to delete directory then you will never know that whether your program failed to remove some directory and I have seen many developers hit by this bullet. Thankfully, JDK 7 added another delete() method in Files utility class to delete file and directory, which throws IOException when a file cannot be deleted. This is really useful for troubleshooting purpose e.g. to find out why a file cannot be deleted. There is one more similar method, Files.deleteIfExists(), which is slightly more readable than original delete() method from File class. 

Now coming back to our original question, how to delete a folder with files or sub folder inside it. Well, we need to write a program which can recursively check all files and folder and delete them before deleting the top level directory. In this example, I have create a directory structure with one directory containing a file and a sub-directory containing another file and tried to delete the top directory using our method. 

How to delete non empty directories in JavaIn this program, I have two overloaded method, deleteDirectory(File file) and deleteDirectory(String path) to demonstrate the right and wrong way to delete a directory in Java. The method which accepts a String argument, first print all contents of directory without printing contents of sub directory and then just call delete method on the directory we want to delete. This method cannot remove a non-empty directory, so it failed and return false which is captured in method.  The right way to delete a directory with files is to recursively delete any sub directory and files inside it, which is demonstrated in deleteDirectory(File) method. This method first check if the given File instance represent a directory, if yes then it list all files and sub directory and recursively call the same method to delete each of them. This allows program to remove files inside a sub folder before removing it. Once everything inside given directory is deleted, it proceed to delete the given folder. 

import java.io.File;

/**
* Java Program to delete directory with sub directories and files on it 
* In this example, we have a directory tree as one/ abc.txt
* two/ cde.txt and we will try to delete top level directory one here. 
*/
public class FileDeleteDemo {

    public static void main(String args[]) {

        deleteDirectory("one"); // wrong way to remove a directory in Java
        deleteDirectory(new File("one")); //right way to remove directory in Java                              

    }

    /*
     * Right way to delete a non empty directory in Java
    */
    public static boolean deleteDirectory(File dir) {
        if (dir.isDirectory()) {
            File[] children = dir.listFiles();
            for (int i = 0; i < children.length; i++) {
                boolean success = deleteDirectory(children[i]);
                if (!success) {
                    return false;
                }
            }
        }

        // either file or an empty directory
        System.out.println("removing file or directory : " + dir.getName());
        return dir.delete();
    }

    /*
     * Incorrect way to delete a directory in Java
     */
    public static void deleteDirectory(String file) {
        File directory = new File(file);
        File[] children = directory.listFiles();
        for (File child : children) {
            System.out.println(child.getAbsolutePath());
        }

        // let's delete this directory
        // it will not work because directory has sub-directory
        // which has files inside it.
        // In order to delete a directory,
        // you need to first delete its files or contents.
        boolean result = directory.delete();
        if (result) {
            System.out.printf("Directory '%s' is successfully deleted",
                                directory.getAbsolutePath());
        } else {
            System.out.printf("Failed to delete directory '%s' %n",
                                directory.getAbsolutePath());
        }
    }
}
D:\Programs\Test\one\abc.txt
D:\Programs\Test\one\two
Failed to delete directory 'D:\Programs\Test\one'
removing file or directory : abc.txt
removing file or directory : cde.txt
removing file or directory : two
removing file or directory : one


That's all on how to delete non empty directory with files in Java. As you can see in output that method which takes String path is not able to delete our directory with files "one", instead it failed, while our second method has recursively deleted everything inside this top level directory, you can see files are deleted before directory to make them empty. I have not tested this code heavily but it should work on all Java version starting from Java 1.2. It is not using any JDK 7 method e.g. Files.delete() or Files.deleteIfExists() so you can use it with Java 1.5 and Java 1.6 as well. Just remember that you cannot delete a folder with files in Java without removing everything inside it.

Introduction of How Android Works for Java Programmers

Android development is current buzz in Java programming world. It's the Android, which keeps Java in the fore front from last couple of years. Now, How important is to understand or learn Android for Java programmers? Well it depends, if you like application development and want to reach mass, Android offers that opportunity to you. Millions of Android phones are available and they are keep increasing, with pace, much higher than IPhone or iOS. What all these means is, it does make a lot of sense to learn Android programming for Java programmer, and this article is about that, but this is also a one of the  good reason to learn Java programming. This tutorial will give you basic idea of How Android works? not detailed but a good overview. One distinct advantage Java programmers has over others is that Android API is much like Java API, though Android doesn't support all classes available in J2SE SDK, it supports critical ones. Another advantage is that, you can use same tools e.g. IDE like Eclipse to develop Android applications, Google provides Eclipse plug-in for Android development. On opposite, if you want to go for  iOS development, A steep learning curve with Objective C and iOS SDK waits you. I think it make more sense for a C++ programmer to do Objective C and iOS, than a Java Programmer. So classic battle of Java vs C++ still continues with Smartphone application development. Any way, let's come to the topic of How Android works internally. . If you are looking for some good books to start with Android, you can also check out Professional Android 4 Application Development and Ian F. Darwin’s Android Cookbook.


How Android works

How Android works , app runs on device from Java programmersAs I said Android uses Java for application development. So you can code your Android apps using Java API provided by Google, and it compiles into class files. Similarity ends here, Android doesn't use Java Virtual machine (JVM) for executing class files, instead it uses Dalvik virtual machine, which is not a true JVM and doesn't operate on Java byte code. In order to run on Dalvik Virtual machines, class files are further compiled into Dalvik Executable or DEX format. After conversion to DEX format, class files along with other resources are bundled into Android Package (APK) for distribution and installation into various devices. Key thing to know is that, Dalvik VM is based on subset of the Apache Harmony Project for its core class library, which means it doesn't support all J2SE API. If you are using Eclipse IDE for coding Android Apps, then you don't need to worry much because, it will help you with code completion. Now let's see How Android Application runs on device?


How Android apps runs on Device

If you are familiar with Linux and concept of process, then it's easy to understand how android applications runs. By default, Each Android application is assigned a unique user id by the Android operating system. After starting android application, they run on there own process, inside there own virtual machine. Android operating system manages starting and shutting down the application process, whenever required. This means, each android application runs in isolation with other, but they can certainly request access to hardware and other system resources. If you are familiar with mobile application development, may be in J2ME, then you may know about permissions. So when an android application is installed or started, it request necessary permission required to connect internet, phone book and other system resource. User explicitly provides grant these permissions, or it may deny. All these permissions are defined in manifest file of Android application. Unlike Java Manifest file, Android manifest is an XML file, which lists all the components of apps, and settings for those components. Four major components of Android application development is Activities, Services, Content Providers and Broadcast Receivers. Activity is most common of them, as it represent a single screen in Android Application. For example, in an Android Game, you can have multiple screens for login, high score, instructions and game screen. Each of these screen represent different Activities inside your app. Similar to Java, good thing about Android is that it manages certain task on behalf of developer, one of them is creating activity object. Activities are managed by System, when you want to start an activity, you call startActivity() method which takes an Intent object. In response to this call, System can either create new activity object or reuse an existing one. Just like Garbage collection in Java, manages a critical task or reclaiming memory, Android manages starting, stopping, creating and destroying of apps by themselves. You may think it's restrictive, but it's not. Android provides life-cycle events, which you can override to interact with this process.


That's all on How Android works.  Android is definitely worth learning for Java programmer, as it uses Java, you can reuse your existing knowledge of Java programming techniques, design patterns and best practices to code a good android app. Of course, you need to adapt some Android specific things like, but those will come along. So, what are you waiting for, go and explore more about Android and write an Android HelloWorld application. Finally you can also take a look some of the best book to start with Android development, Professional Android 4 Application Development and Android Cookbook by Ian F. Darwin.


Blog Archive